
The CARES watch project has been developed as output of the CARES mobility held in Messina from 30th of May to the 3rd of June.
The realization of the CARES watch is willingly multidisciplinary and involves the understanding and the skills acquired during the mobility itself: CAD design (2D and 3D), laser cutting, 3D printing, electronics and programming.
Programming
Once the device has been assembled, the following steps are required in order to load the firmware in it.
Before starting, make sure you have a USB-microUSB cable and you have already installed the Arduino IDE on your PC.
The 1st step is to configure the Arduino IDE to support the board on which the CARES watch is based, a LOLIN32 Lite Board mounting a ESP32 microcontroller.
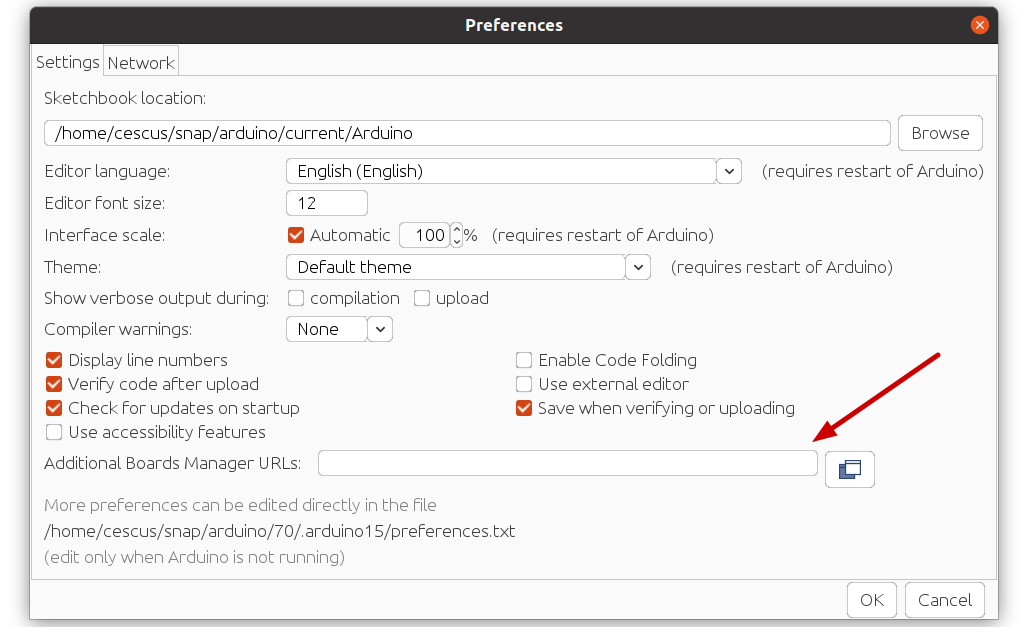
Open the IDE and go to File > Preferences and paste in the field Additional Boards Managers URLs the URL https://raw.githubusercontent.com/espressif/arduino-esp32/gh-pages/package_esp32_index.json, this operation is needed to tell to the IDE how to deal with the specific board in use.
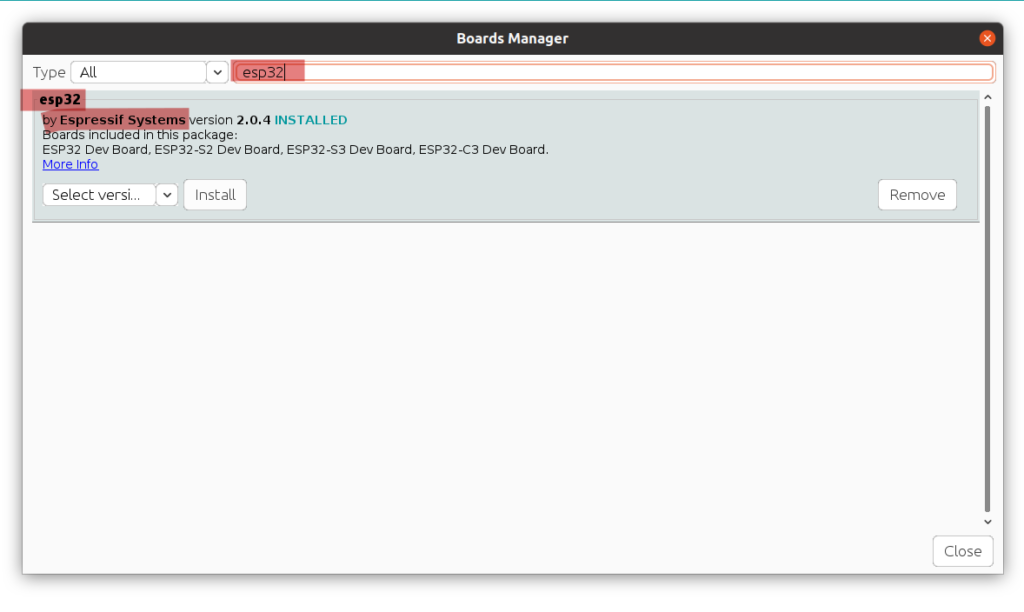
Then go to Tools > Board: “…” > Boards manager, look for the esp32 board and install it.
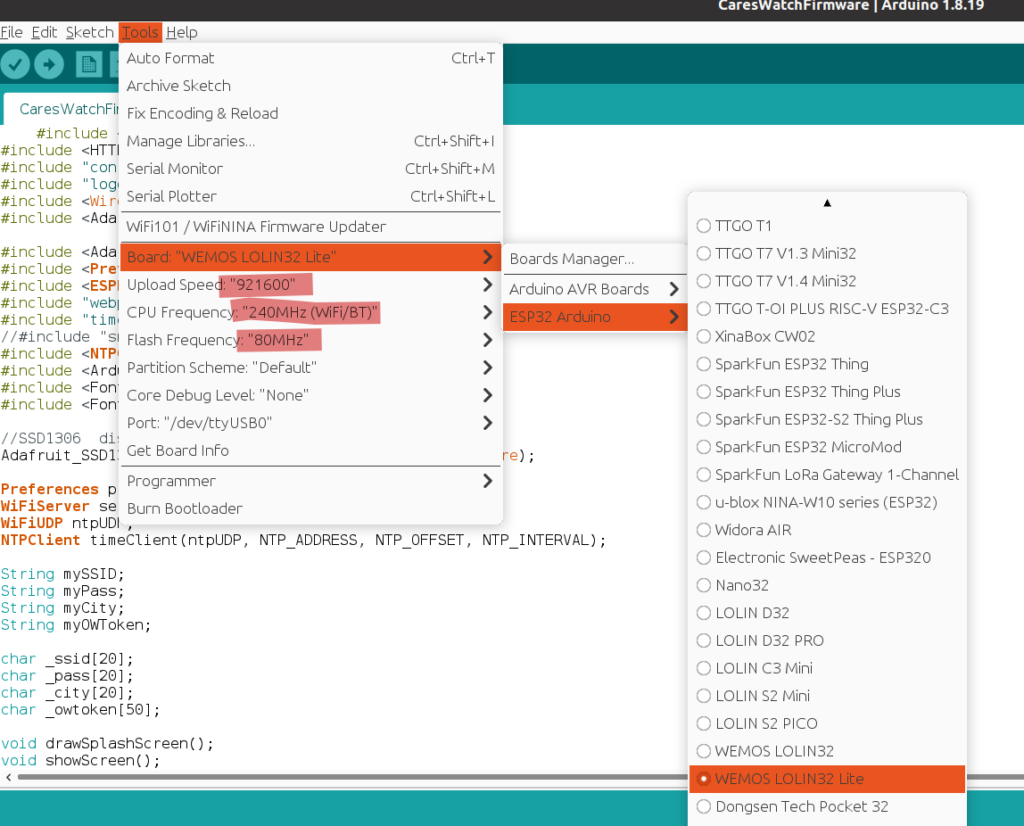
The 2nd step is to configure the IDE to make use of the specific board, therefore go on Tools > Board: “…” > ESP32 Arduino and select WEMOS LOLIN32 Lite. Then make sure that the configuration of the board matches the one shown in the following screenshot.
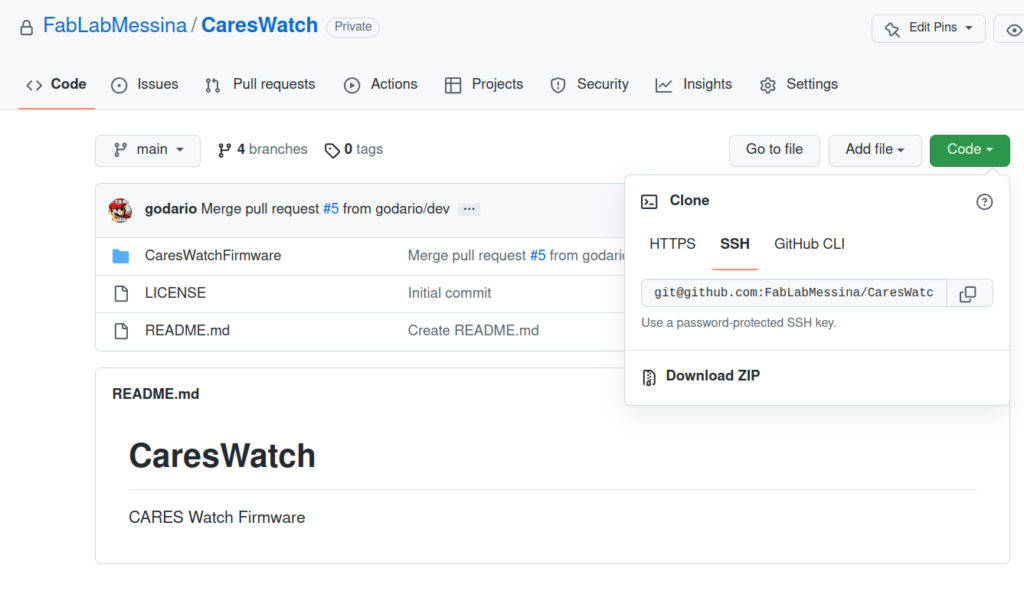
Now it is time to download the code of the firmware as 3rd step. Follow the link https://github.com/FabLabMessina/CaresWatch and download the .ZIP file containing all the Open Source files of the CARES Watch. Extract the .ZIP archive and, coming back on the Arduino IDE, go to File > Open…, navigate to the just extracted folder, select the folder CaresWatchFirmware and open the file CaresWatchFirmware.ino. The code of the firmware is now loaded and ready to be explored!
The 4th step is about installing all the external libraries on which the firmware relies on, needed in order to compile the firmware. Go to Sketch > Include Library > Manage Libraries… to browse all the available libraries and look for:
Adafruit SSD1306, the driver for the screen (install all);NTPClient, that implements the protocol to retrieve the time from internet;ArduinoJson, that is used to parse the answers given by remote services.
The 5th step is to install manually an additional library that allows showing a graphical interface through the browser, ESPForm. You can download the library from here: ESPForm. Go back to the Arduino IDE and go to Sketch > Include Library > Add .ZIP Library… and load the just downloaded .ZIP file. Now it is all ready to check if the procedure has been carried out correctly: just press the Verify button and wait for the message “Done compiling”, if it doesn’t appear, try double checking the steps above.
aux
The 6th step is the loading of the firmware. By mean of the microUSB cable, connect the CARES Watch to your computer and, under the menu Tools > Port, select the newly attached device (usually it has a name related to tty on Linux/Mac systems and related to COM on Windows systems). Once it is everything ready, just click on the Load button and wait for the procedure to complete. Congratulation, you’re CARES Watch is now ready to be used and customized!
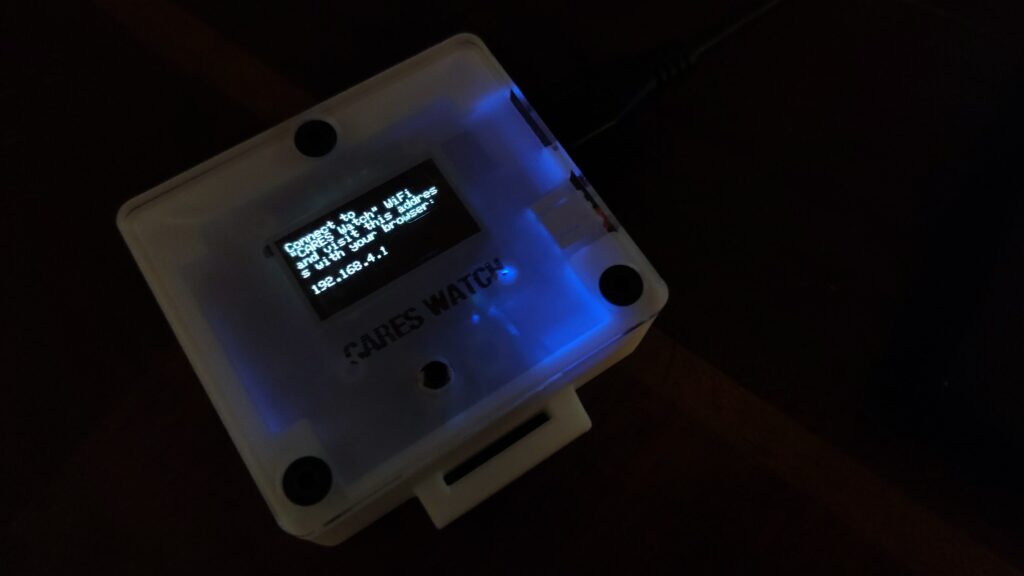
The 7th step, the last, is the configuration of the watch. After the firmware is loaded, the watch will create a WiFi network (“CARES Watch”) through which it will be possible to configure the watch itself. Connect to it and go to http://192.168.4.1/, the graphical interface will be shown in the browser. From the interface it is possible to specify the name and the password of the WiFi network on which the watch will rely on.
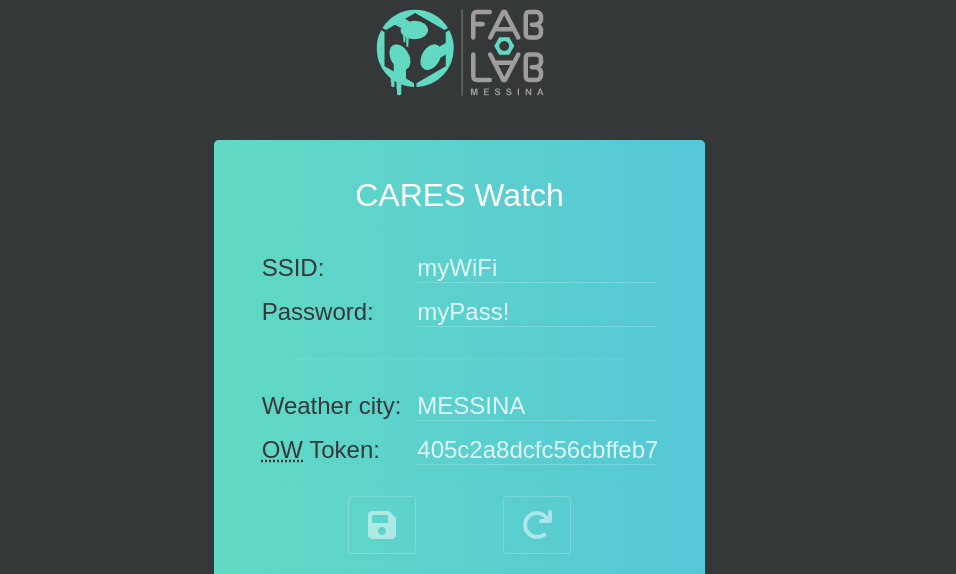
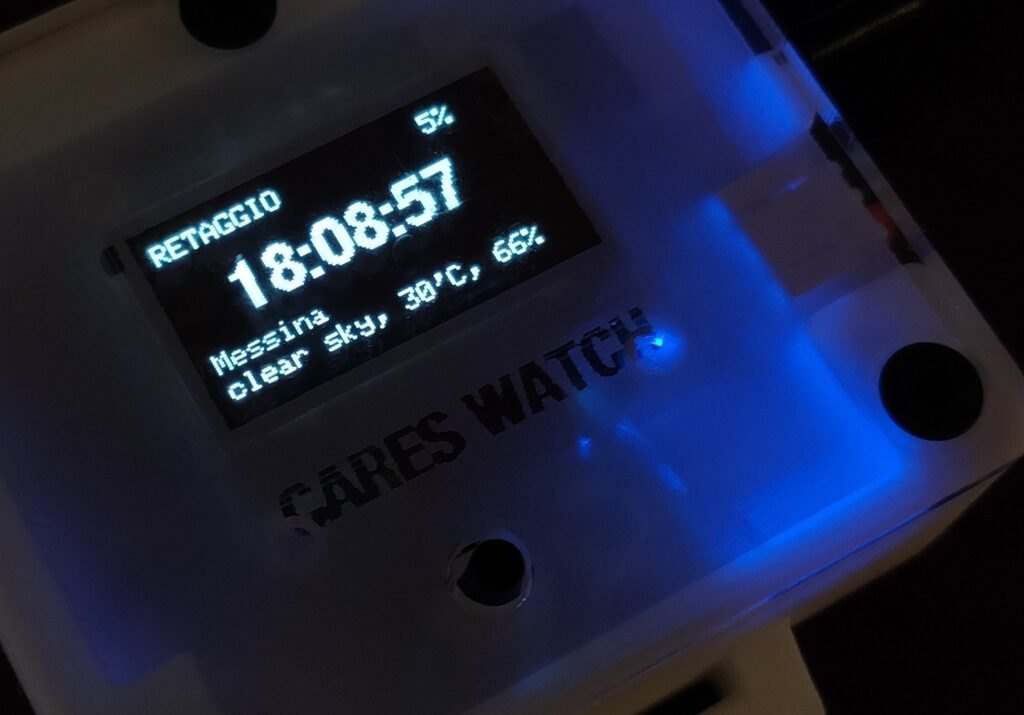
The default application of the Watch provides the weather forecast through the platform OpenWeather. In order to configure the service, it is enough to sign up to the service, specify the name of the city of interest and paste the Token (or API Key) that can be found here. Now the smartwatch it ready to be enjoyed and customized!
NOTE: to reset the watch and be able to configure it again via browser, just keep the button pressed while the watch is booting (as soon as the battery is connected or it is plugged to a power source).